This guide is educational, not personalized financial, legal or security advice. A checklist reduces avoidable mistakes; it cannot make a transaction risk-free.
The configured input is Circle USDC on Solana Mainnet; Devnet and Testnet tokens are not substitutes. Match the project's stated $STONKB mint and fee payer; neither a mint match nor a confirmed transaction proves safety or value.
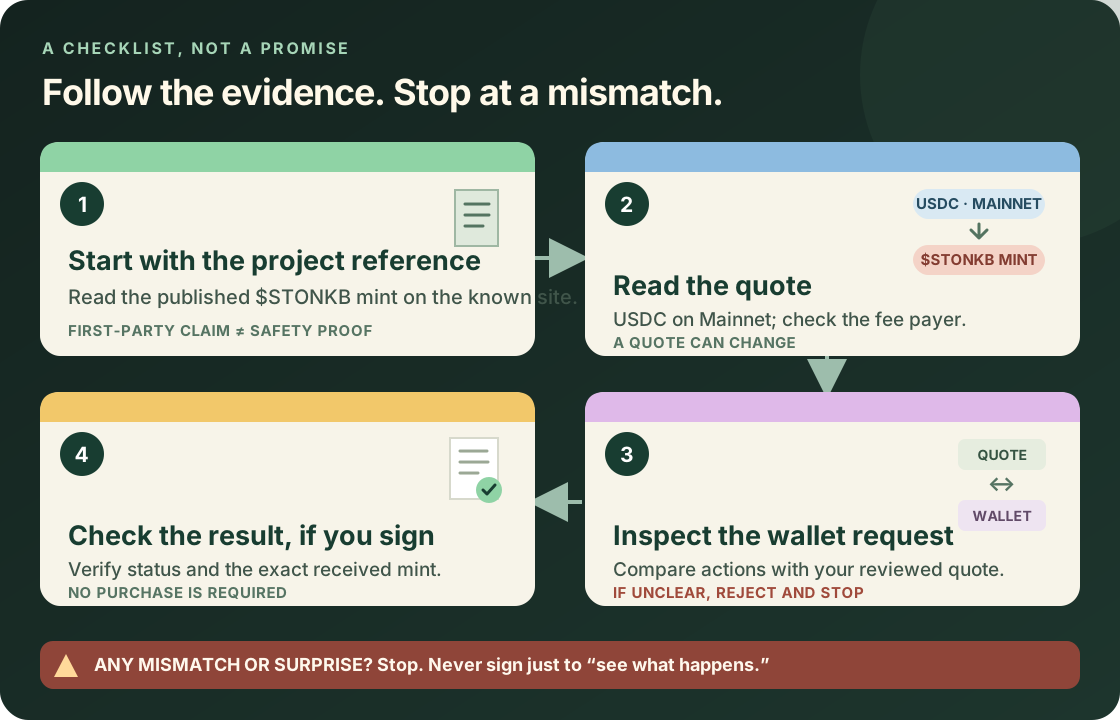
- Open the known first-party project site and read its published mint; this is an identity claim, not a safety audit.
- Confirm the wallet is on Solana Mainnet, then match both mints, output amount, minimum received and the named fee payer.
- Compare the wallet's requested actions and fee payer with the quote. Reject and stop if anything is unfamiliar or inconsistent.
- Only if you chose to sign, inspect transaction status and confirm the resulting token account uses the intended mint.
The wallet shows Devnet, while the configured pair uses Mainnet mints. What should you do before connecting or signing?
What the project reference does—and does not—verify
The StonkBuilder site currently presents $STONKB as its community token on Solana and publishes this mint: H4Fx7kqZcxbyNnF7qKBZsiJ1VGeTTSQMWjCXFp9maugQ. That is the project's own identity claim, not an independent safety review or a promise about price, liquidity, or value. Open the known StonkBuilder site yourself, then compare the full address—not just the ticker or logo—in the quote and wallet prompt. A Solana explorer record for the mint can help inspect public records for that address; it is not an independent endorsement or an assessment of whether buying is suitable.
Before opening the quote: check the input and fee
The StonkBuilder buy page is the project's own purchase page, not an independent endorsement. It currently states a 1% transfer tax on buys, sells, and wallet transfers. Treat that as a project-published fee description, not an independent audit; confirm current terms and check every fee shown before deciding. The page lists network fee, route, and trading fee separately. Circle's USDC contract-address list identifies the configured input as its Solana Mainnet USDC mint. The project's published output mint is the intended token identifier to compare. Jupiter's Plugin customization guide documents that an integrator can preset input/output mints or lock one side to a mint; this describes a capability, not proof of the live page's exact configuration. A preset pair does not prove that a live route or quote is available.
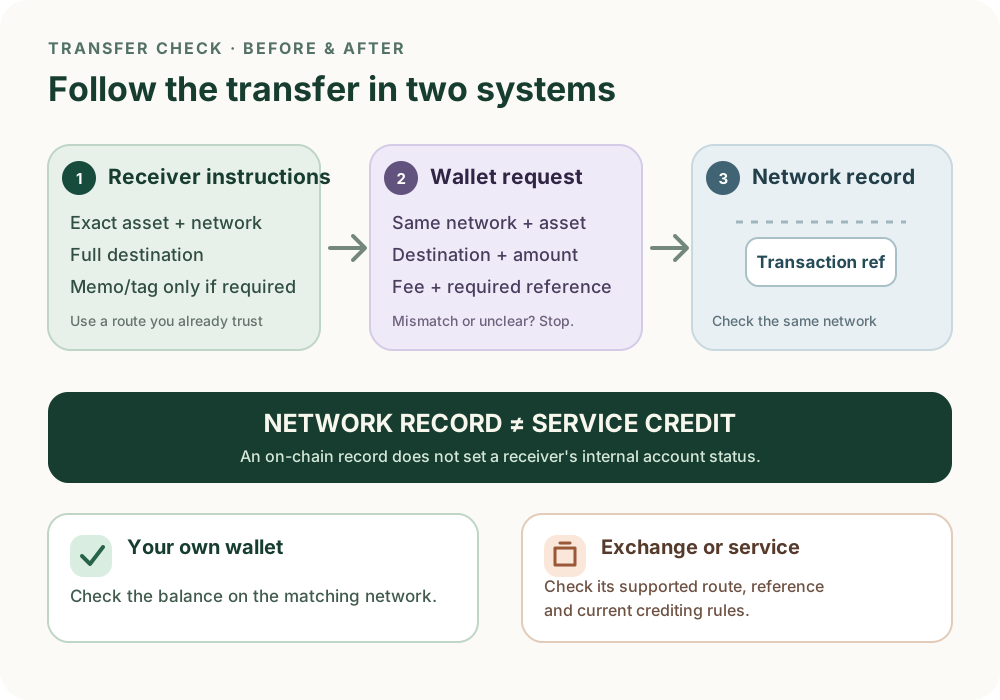
Solana's cluster guide distinguishes Mainnet, the production environment, from Devnet, where tokens are not real, and Testnet, which is used for stress testing. Do not treat balances or mint addresses on a test cluster as Mainnet assets. This page describes the configured Mainnet pair, not a test-token exercise. If your wallet or explorer says Devnet or Testnet, stop—do not treat those balances as the assets in this pair. You can keep learning here without a wallet, transfer, or purchase. If you do not have USDC on Solana Mainnet, pause and check your provider's current supported withdrawal route, network, recipient instructions, and total costs first. The crypto transfer guide explains those checks.
Solana's fee documentation says transactions require fees paid in SOL; its transaction guide notes that fees are still charged when a transaction fails. The transaction's named fee payer covers the network fee. Solana's fee-abstraction guide explains how a separate sponsor can pay it; do not assume this Jupiter swap is sponsored. Check who pays and what the wallet requests before signing. Do not buy or send extra assets just because a message or an unclear prompt tells you to.
Follow the checks in order; buying is optional
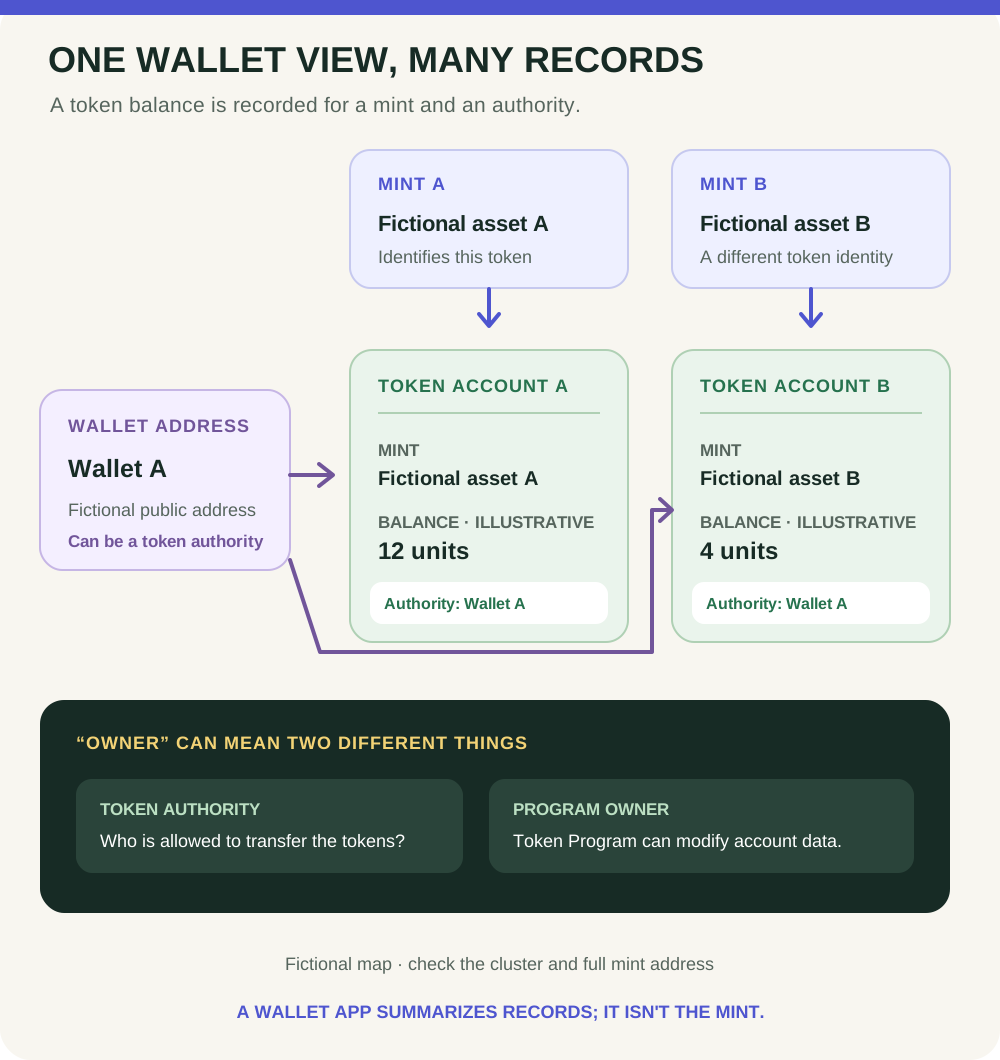
1. Start with the network and asset. Confirm the wallet is on Solana Mainnet. The official purchase page displays the project-published $STONKB mint; compare the full output address with the project reference. Compare full mint addresses, not just tickers or logos; a matching ticker on Devnet, Testnet, or another network is not the same asset. 2. If you choose to connect to view a quote, verify the destination and network first. The current project page prompts for a wallet connection to detect assets; you can choose not to connect. Connecting and signing are separate steps. If a quote becomes available, confirm the input is USDC on Solana Mainnet and match both assets, including the full output mint. Review the amount in, estimated amount out, minimum received if shown, price impact if shown, any slippage setting if shown, and every fee or warning the interface displays. Quotes and routes can change or disappear. Do not treat an estimate as a guaranteed fill. 3. Compare the wallet request with what you chose. A Solana transaction can contain multiple instructions. Check the network, token, amounts, requested actions, and fee payer your wallet shows. If anything is different, unfamiliar, hidden, or unclear, reject it and stop; a familiar app name is not enough. Never share a recovery phrase, private key, or wallet password. 4. If you choose to sign, verify the result separately. Use the transaction signature to inspect its status, then check that the resulting token account is tied to the exact mint you intended. Solana's token-account guide explains that each token account holds one mint; if that relationship is new, see Solana token accounts explained. If the transaction fails, investigate the reason instead of repeatedly changing slippage; Solana documentation notes that the fee payer may still be charged when execution fails.
Learn without moving money
You can check the project-published mint and learn the network and fee checks without connecting a wallet or making a purchase. The live quote may require a wallet connection; viewing it is optional, and you can stop before signing. For transfer basics, read the first-crypto-transfer checklist; to understand why a token account is tied to one mint, see Solana token accounts explained. For lookalike domains, fake support, and urgency tactics, use the general crypto-scam checklist.
The optional purchase interface is on the official StonkBuilder page and may rely on a live third-party service. Jupiter's docs describe Plugin as an embeddable swap interface; its interface, availability, route, fees, and privacy practices can change. This guide is educational, not a recommendation. Crypto assets can lose value, and no checklist or successful transaction removes that risk. Choosing not to buy is a valid outcome.
Check your understanding.
What does a match with the project-published mint establish?
A correct answer records local learning progress, not a qualification or proof of financial readiness.
Put this lesson in context
Begin with terminology and token identity, then read the relevant wallet and risk guides. Buying is optional.
Sources & context
- StonkBuilder (first-party project reference) — $STONKB on Solana ↗Consulted 2026-10-12
- Jupiter — Integrate Jupiter Plugin ↗Consulted 2026-10-10
- Jupiter Developers — Customizing Plugin ↗Consulted 2026-10-09
- Circle — USDC contract addresses ↗Consulted 2026-10-09
- Solana Documentation — Clusters and public RPC endpoints ↗Consulted 2026-10-11
- Solana Documentation — Create a Token Account ↗Consulted 2026-10-07
- Solana documentation — Transactions ↗Consulted 2026-10-11
- Solana documentation — Fee Structure ↗Consulted 2026-10-11
- Solana documentation — Fee Abstraction ↗Consulted 2026-10-11
- StonkBuilder (first-party project reference) — Buy $STONKB ↗Consulted 2026-10-12
Original educational content prepared for this project. Sources provide context, not endorsement or a guarantee that every statement remains current. Rules, product interfaces and availability can change.
Keep learning in Telegram.
Open this published guide in the learning bot. No account connection or wallet is needed.
Join the $STONKB community.
Follow project updates, share useful ideas and meet other builders. You do not need to buy $STONKB to join.
Take what you learned.
Leave the pressure behind.