This guide is educational, not personalized financial, legal or security advice. A checklist reduces avoidable mistakes; it cannot make a transaction risk-free.
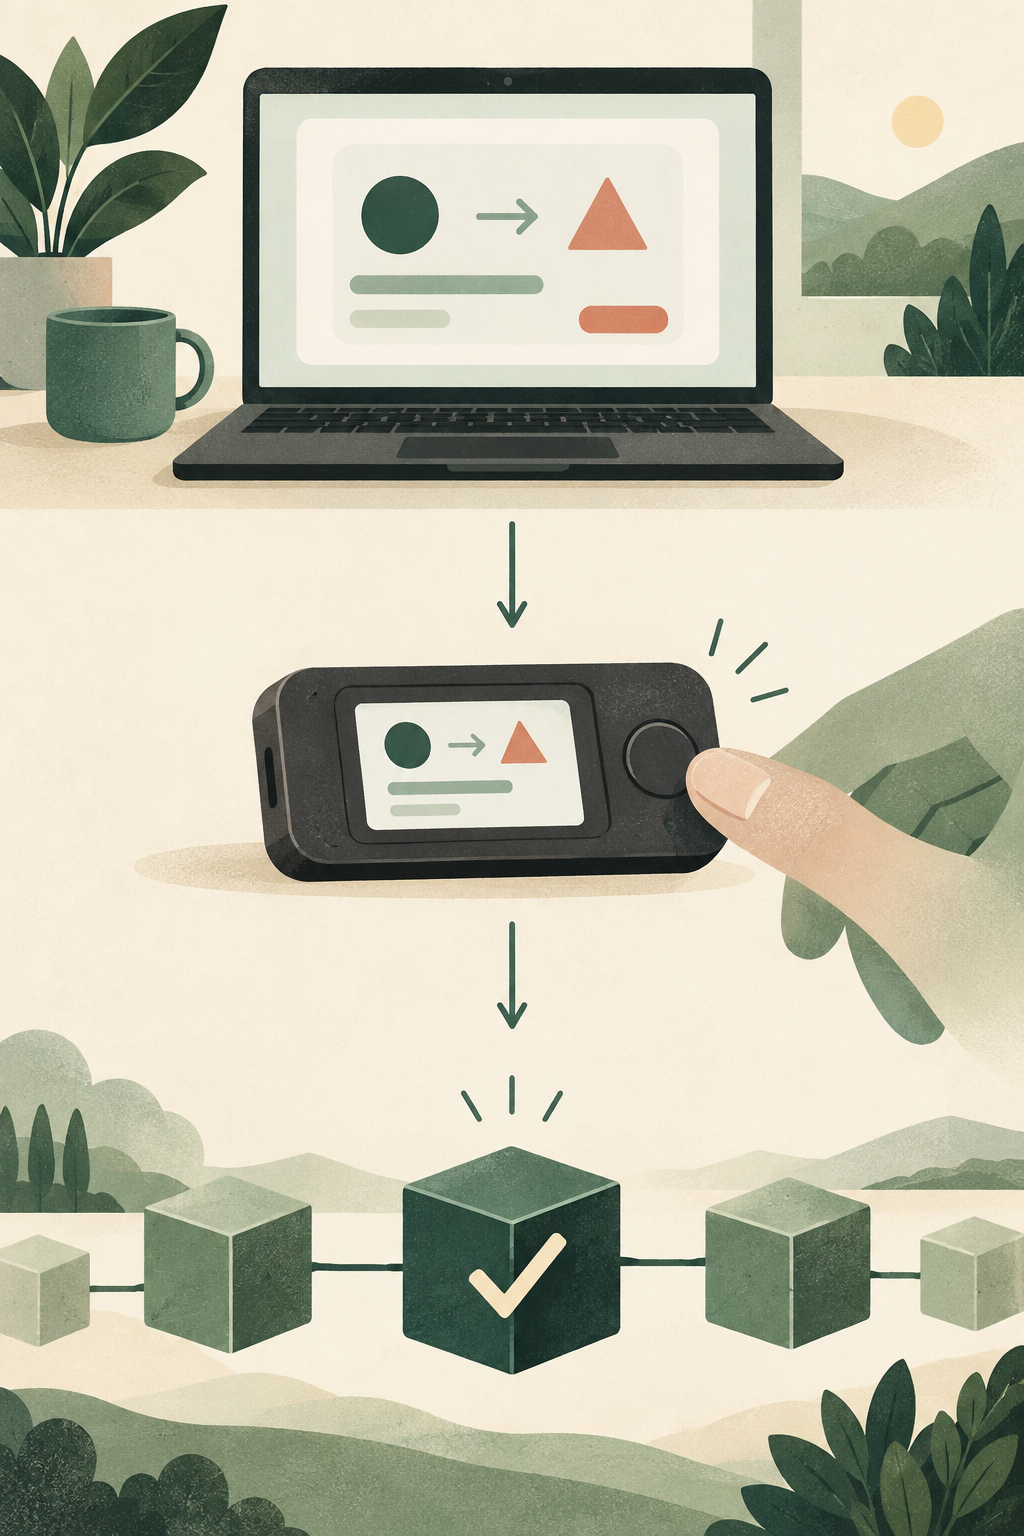
A signer creates a separate approval checkpoint between transaction preparation and network submission.
- Wallet software prepares the transaction request.
- The user checks the details on the signing device.
- The device signs only after physical approval.
- Connected software can then submit the signed transaction to a network.
Which details would you verify before approving, and what would you do if the display is unclear?
The short answer
A Ledger hardware wallet, also called a signer, works alongside an internet-connected phone or computer. Wallet software prepares a transaction request. The device uses the relevant private key to sign only after you review and approve the request on the device. The signed transaction returns to the connected software, which can submit it to the blockchain network.
The private key is not supposed to be copied into the companion app. The connected phone still matters: it is where you find accounts, choose an action and start the request. The signer provides a separate approval surface, but the user must understand the details that appear there.
The transaction, one step at a time
Prepare the action
You choose an action such as sending an asset or interacting with an application. The software assembles transaction details and sends a signing request to the device. The connected phone or computer is part of the workflow and may be exposed to malicious links, browser extensions or misleading screens.
Review the device display
The device displays information about the requested action. Depending on the network and transaction type, some fields may be technical, long or difficult to interpret. Check the destination, amount, network and action being authorized. For contract interactions, understand any permissions or token approvals too. If the display does not show enough information to understand the request, do not guess.
Approve or reject
Physical approval is the point where your key authorizes the transaction. Reject requests you did not initiate, cannot explain or cannot match to your intent. A device can help isolate signing, but it cannot decide whether a recipient deserves trust or whether a contract behaves honestly.
Broadcast and confirm
After signing, wallet software may submit the transaction to the relevant network. The signer does not guarantee that the network will process it, that the transaction is reversible or that an application will credit it as expected. Check the network and, when useful, verify the transaction through a trusted explorer or service.
What the separation changes
The connected computer can prepare a request without holding the private key used to authorize it. The signer adds a separate place to inspect and confirm. This can reduce some kinds of key exposure, but does not remove every risk. Malware can still alter what an app asks you to do; deceptive interfaces can hide an approval's purpose; and users can approve requests without recognizing their consequences.
Use the device display as a deliberate checkpoint. Do not approve quickly just because a request came from an application you have used before. A familiar brand or previous successful transaction is not proof the current request is safe.
A practical example
Suppose a browser page says it will send a small collectible, but the device display asks you to grant broad token permissions. The device is showing the authorization it received; it is not confirming the page's story. Reject the request and independently verify what the application is asking for before trying again.
Before the first real transaction
- Install official companion software from a route you independently verify.
- Learn what the device display shows for the transaction types you expect to use.
- Confirm the destination using a trusted source; do not rely only on familiar first and last characters.
- Understand that contract approvals can authorize more than a simple transfer.
- Never enter a Secret Recovery Phrase into the app or support page as part of ordinary signing.
Your next step
Read the device setup and authenticity checklist before initializing a device. For the broader custody choice, compare hardware wallets and software wallets.
Compare current Ledger options.
Start with the networks, devices and recovery responsibilities covered in this guide. Check current compatibility, price, shipping and returns on Ledger’s official store.
Referral disclosure: StonkBuilder Learn may earn a referral commission if you buy through this link.
Compare current Ledger optionsThe link is optional. This guide is educational and is not a product endorsement or a guarantee of security.
Is a signing device relevant to your workflow?
Choose the statements that describe needs you have already identified.
This is a learning prompt, not a personalized recommendation. Leaving every box unchecked is a valid reason to keep learning.
Check your understanding.
What should you do when the device request does not match the action you intended?
A correct answer records local learning progress, not a qualification or proof of financial readiness.
Sources & context
- Ledger Academy — How Ledger Hardware Wallets Work ↗Consulted 2026-09-23
- Ledger Academy — What Is a Hardware Wallet? ↗Consulted 2026-09-23
- Ledger Academy — What Is a Signer? ↗Consulted 2026-09-23
Original educational content prepared for this project. Sources provide context, not endorsement or a guarantee that every statement remains current. Rules, product interfaces and availability can change.
Take what you learned.
Leave the pressure behind.